The application note purpose is to guide the user in performing a license activation procedure.
Introduction
ZEISS arivis products, including ZEISS arivis Pro (formerly arivis Vision4D) and ZEISS arivis Pro VR (formerly arivis VisionVR) are protected from unauthorised usage using a licensing system. This licensing system limits the features available to the user, the number of users who can use a license simultaneously, what updates can be applied, and how the license can be accessed.
The licenses can come as either "Soft" licenses based on physical characteristics of a computer, or "Hard" license tied to a USB "dongle". The licenses can also be fixed, where only the machine where the license resides can use it, or floating, where the license resides on a license server and is then distributed out to clients on the network.
Hard licenses do not normally require activation, but soft licenses do.
This article describes how to:
- Activate a license after purchase
- Install the arivis Licensing Tool
- Update license
- Transfer a license
License Activation
If the license is tied to a dongle, activation is not required. If experiencing problems with a hard license, please check our License Troubleshooting article.
If the license is tied to a PC (soft license), a product activation key is normally sent to the license purchaser along with download links for the software installation. Once the software is installed the license can be activated using the key provided on as many machines as the key has been licensed for.
Note that in the case of multiple user server/floating licenses, activation is only required once on the server machine. There is no need to activate for each user. Please check this article for further information on configuring server licenses.
The software activation requires a connection to the licensing server hosted by ZEISS arivis and therefore also requires an internet connection. Since not all computers are connected to the internet, alternative methods of license activation are available.
Online license activation
The simplest way to activate a soft license is through the online license activation process. This online activation is prompted automatically if no license is detected when starting the software:

In that case, simply click on the link to License Tool. This will open the arivis License tool where you can proceed with the rest of the activation procedure. Alternatively, you can open the License Tool as described below.
Once open, click on the Online Activation button and, when prompted, enter your product key.
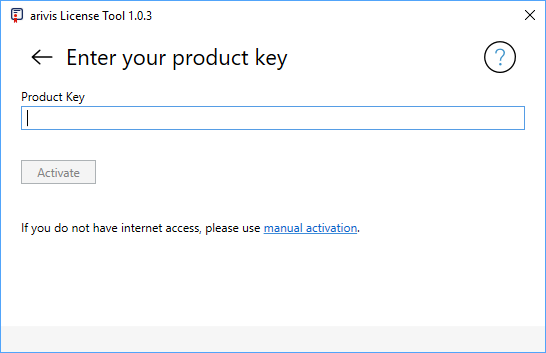
Then click Activate. Typically, within a couple of seconds, your license will be activated and a message will appear to confirm that this is so. You can then start using your license by launching the software.
Offline license activation
In some cases the computer where you want to activate the license may not be connected to the internet or the connection may be restricted by a firewall and offline activation may be required. This will require:
- another computer that is connected to the internet
- some way to transfer files from between the computers where the license will be installed and where it will be activated (e.g. USB storage device).
In such cases, start the activation tool on the computer where you want to install the license as before, but then click on the + sign to show more options:
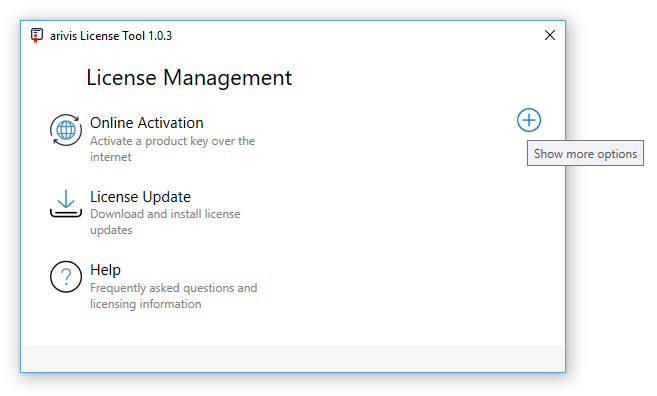
Then click on Manual Activation.
Offline activation is a 3 step process where we must:
- Create a fingerprint that can be used to encrypt your key for your hardware
- Request a key based on this fingerprint
- Install the key on the computer to be licensed
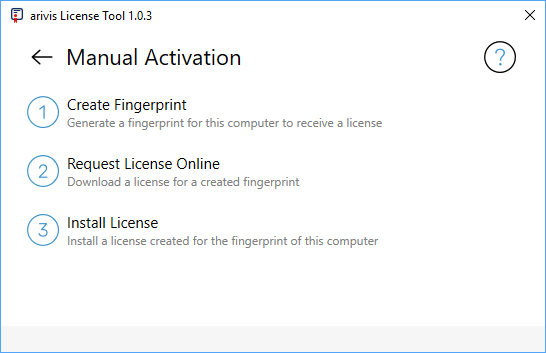
Click on Create Fingerprint to start the process and you will be prompted to select a location where to save the fingerprint (C2V file). Make sure to make a note of the saving location so you can find it later.
Then, transfer the C2V file to a computer with internet access where the License Tool is installed (see downloading and installing the License Tool). Open the License Tool and click the + sign to see more options. Click on Manual Activation, but this time, click on Request License Online.
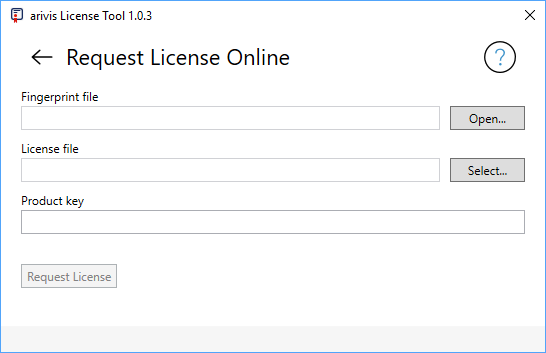
Click Open... to select the C2V file created on your other computer.
Click Select... to set where to save the license file that will be created by the license server.
Enter your product key.
Click Request License.
As with the online activation, your license file will typically be created within a couple of seconds and a prompt will appear to confirm that this is so.
Finally, transfer the V2C file that was created in this last step back to the computer where the software is installed. Open the License Tool, click the + sign to see more options, and click on Manual Activation. Click on Install License and browse to the V2C file you have just transferred.
Once this process is complete you can start using the software.
Installing the License tool
Managing licenses relies on a software tool called the arivis License Tool which can be used to perform most tasks relating to license management. The License Tool is installed automatically with any arivis software installation unless it is already present, but can also be installed independently for older systems or use on server machines that are used for license distribution but not intended to actually run the software. It can be downloaded independently from this link.
Opening the License Tool
If the License Tool was installed as part of an arivis installation, the easiest way to access it through the Windows Start menu Search tool:

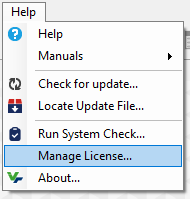
Alternatively, it can also be accessed through the Help menu.
If the software can't be opened because of licensing issues, or if trying to access the License Tool on a computer where Vision4D is not installed (e.g. server machine), it can be accessed by navigating to the application within the Windows Explorer.
If the License Tool was downloaded independently it can be found wherever the ZIP download was extracted. Otherwise it can be found in the software installation path (typically C:\Program Files\arivis Vision4D\LicenseTool\arivisLicensing.exe).
Once opened, the License Tool should look something like this:
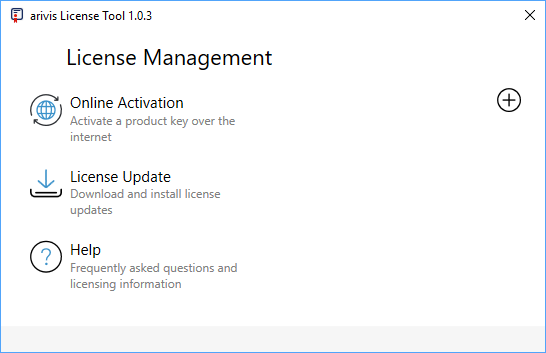
Updating a license
As mentioned in the introduction, the license not only limits the features and the number of users but also what versions of the software you are allowed to run. If you've purchased a maintenance update to allow you to install and run the latest version of the software you will need to update your license as well. This process is the same for soft and hard keys and requires an internet connection.
Open the License Tool and click on Update License.
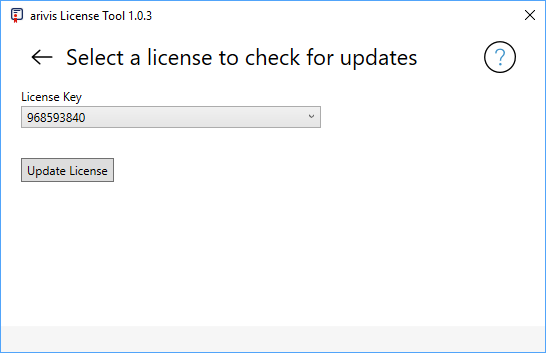
Select the key to be updated from the list and click Update License. The License Tool will connect to the licensing server and update your license. A prompt will appear to confirm when the process is complete. You can then install and start using the latest version allowed by your license.
Note that if the computer is not connected to the internet you may first transfer the license to a computer that is connected, update the license and transfer it back.
Alternatively, contact arivis Support by creating a support ticket.
Transferring a license
Since the license is locked to specific hardware, the process of transferring a license depends on the type of license you have.
If you are using a dongle, all you need to do is unplug the key from the computer where it is no longer needed and plug it into the one where it is. When you start the software it will look for this key and provided the version number is allowed will start. See our troubleshooting page if you have any problems with this.
In the case of soft licenses, it's a little more complicated and you will need to use the License tool and some way to transfer files from between the computers where the license will be installed and where it will be activated (e.g. USB storage device).
Open the License Tool on the computer where you want to install the license to start a 3-step process that will:
- Create a fingerprint for the computer where you want to install the license
- Reconfigure the license from the computer where it is currently installed based on the fingerprint for the destination machine
- Install the license on the destination machine
Start by installing the software and License Tool on the destination computer if not yet installed, then open the License Tool.
Click the + sign for more options and click on Transfer License.

Then, click on Prepare for License Transfer.

You will be prompted to select where to save the ID file for your computer. Make a note of the saving location and then transfer this file to the computer where the license is currently installed.
Open the License Tool on the computer where the license is currently installed, click the + sign for more options and click Transfer License.
Select the license to be transferred from the list of available licenses and then Select.. to load the ID file created previously. Click Transfer to create the new license key that can be transferred to the destination computer (H2H file).
Finally, copy the H2H file over to the destination computer, open the License Tool, and again go to Transfer License. Click Install License and select the H2H file that was just transferred.
Conclusion
Most license related functions can be managed through the arivis Licensing Tool. If your questions have not been addressed by this article, start by checking our other HASP related resources, like our troubleshooting page, or create a support ticket.