Configuring laptop systems to use dedicated GPUs
Introduction
Most modern laptop systems CPUs, and many desktop CPUs also, are configured with a graphics processing unit (GPU), built into the CPU a configuration often referred to as "on-board" graphics. These systems are intended to provide better graphics capabilities without the need for a dedicated GPU which can help preserve battery life on mobile systems. However, these onboard graphics typically offer lower performance than a dedicated GPU. This means that on systems with both onboard graphics and dedicated GPUs the system must choose which GPU to use when launching applications. The windows default for laptop systems is usually to use the onboard GPU as these are more energy-efficient and provide longer battery life. However, for most use cases in arivis Pro/Vision4D that require 3D visualization the use of the dedicated GPU is preferable. Configuring your system to use one GPU over the other can be done in a variety of ways depending on your system.
GPU selection on launch
IF you need to preserve battery life, maybe because you are doing image analysis on the go then sacrificing graphics performance for the duration of the session may be an acceptable compromise, but you may also choose to run the application with the dedicated GPU on other occasions. You can specify which GPU to use on launching the application by right-clicking on the application icon and choosing the Run with graphics processor option:
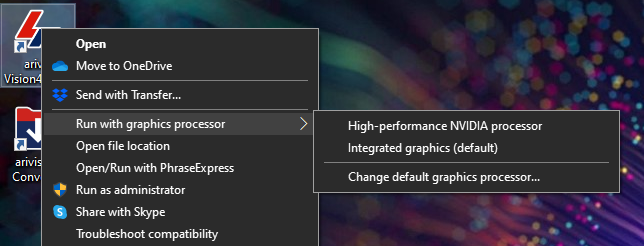
You can then choose with GPU to use as needed and the application will launch.
But it is also possible to permanently set a preference for wich GPU to use that that the application will automatically select a specific GPU on launch unless specified otherwise as above.
Setting default GPU
On older systems the default GPU selection is done through the driver interface. We can start by right-clicking on the icon as above, and then select Run with graphics processor> Change default graphics processor...
On Newer systems we can access the graphics control panel through the task bar. This will open the driver window for the GPU you are using. In this example we are using a NVIDIA GPU and so this opens the NVIDIA Control Panel:
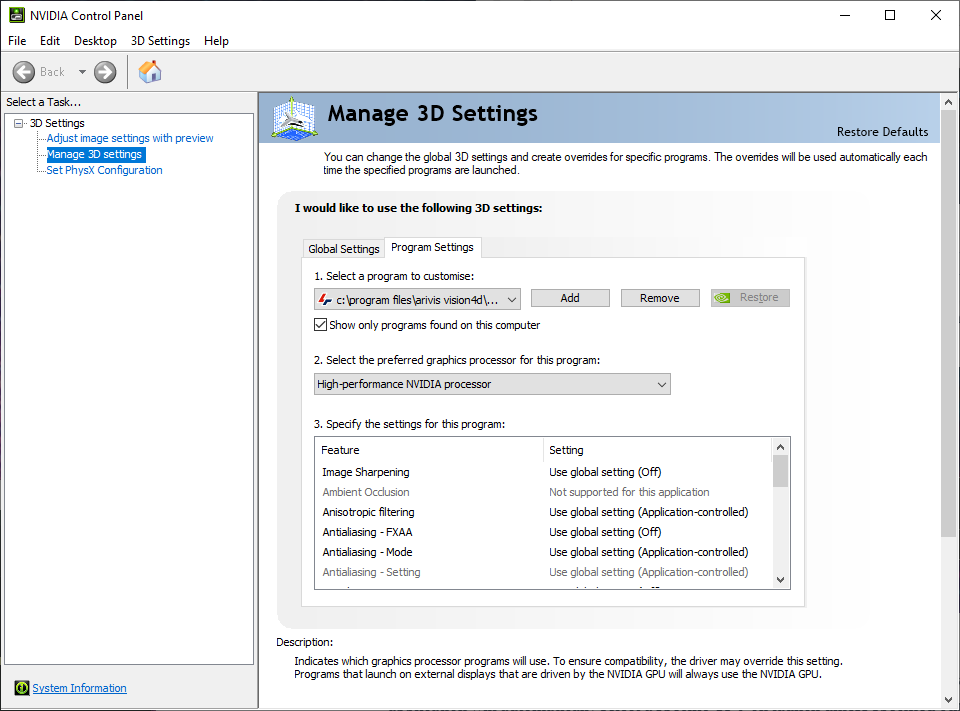
We can then click the Add button to select the path for the ariisVision4D.exe application and then select which GPU to use by default below.
From then on, the system will default to that GPU when launching the application.
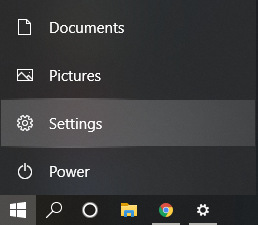
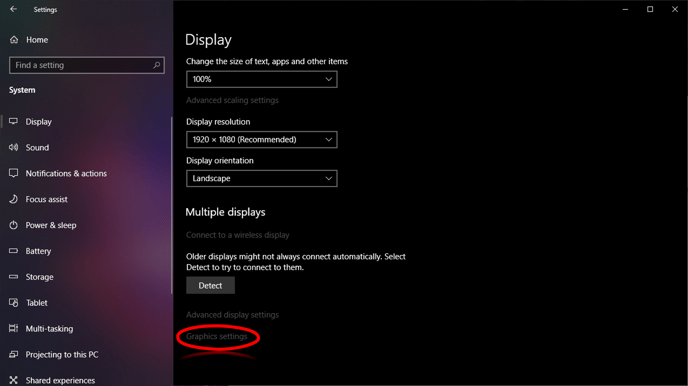
On newer Windows 10 systems the GPU preference is set through the Settings application. Start by opening the Settings app from the Start menu.
Then, select the Systems Settings, and then the Display options. At the bottom of the display setting options, you will find the Graphics settings:
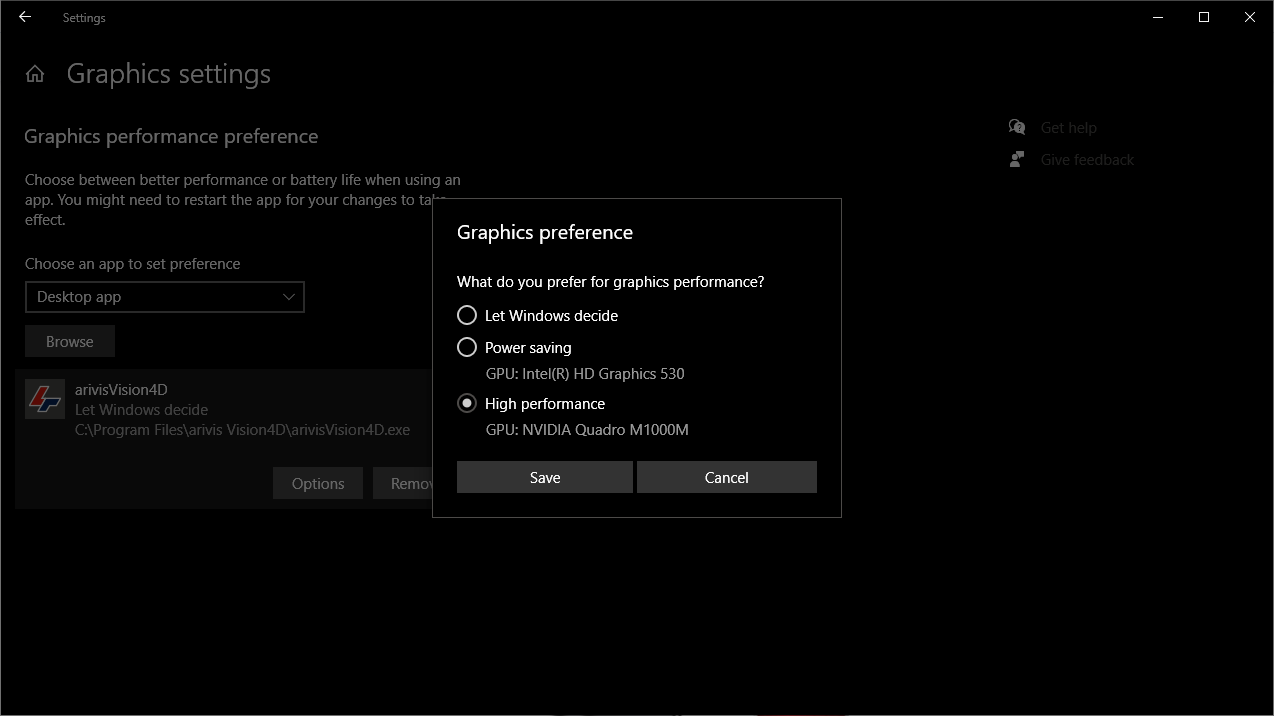
In the Graphics options you can click the Browse button to find the path to your arivis Vision4D EXE and then select which GPU to use by default when launching the application:
Download Full "Run V4D on a laptop» PDF