this article provides instructions for installing and configuring Anaconda Python for Vision4D
Introduction
Anaconda is a Python distribution that aims to simplify package management and deployment. Used in conjunction with the scripting module in arivis Vision4D it allows users to implement advanced image processing that may not be possible out of the box for Vision4D. Anaconda is necessary for a variety of scripts provided by arivis, including our StarDist and CellPose integrations, but is not normally needed except for advanced imaging workflows that use those libraries.
Users of Vision4D 3.3 or earlier should use the Anaconda 2 installation. Installation files for this can be found in the Anaconda archive. These configurations are no longer officially supported.
For all other users, the latest Anaconda release is recommended and can be found here.
Installing Anaconda
The installation is similar to most windows applications, we simply double-click on the installer to start the process.
Then, we can proceed through the installation prompts. The first choice is whether to install this for all users, which requires admin privileges, or just the current user, which does not.
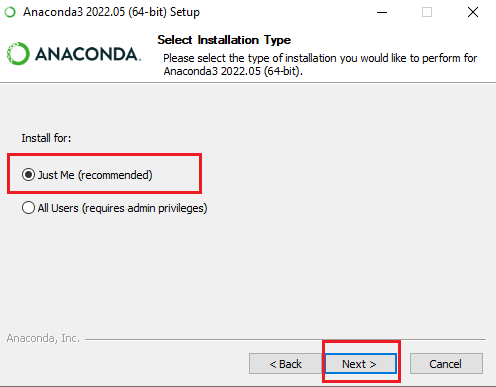
Either will work for your personal usage, but installing for all users is recommended if using the software on a shared PC.
Then we can select where the software will be installed. The default destination is fine for most applications, but we should take note of where this is as we will need this information later when configuring Vision4D.
Note that is installing for individual users you should use the default destination for that condition.
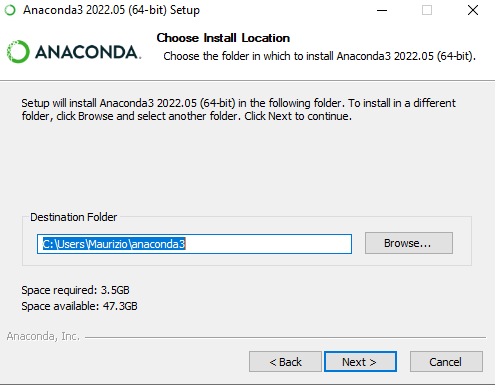
Leave the rest of the default installation options as is and complete the installation.
Configuring Vision4D
Finally, in Vision4D we need to configure the Anaconda environment.
We can start by opening the preferences window and going to the Scripting tab.
For most applications using the default anaconda environment is best. Select the Anaconda Environment option and browse to the folder where anaconda was installed (see above).
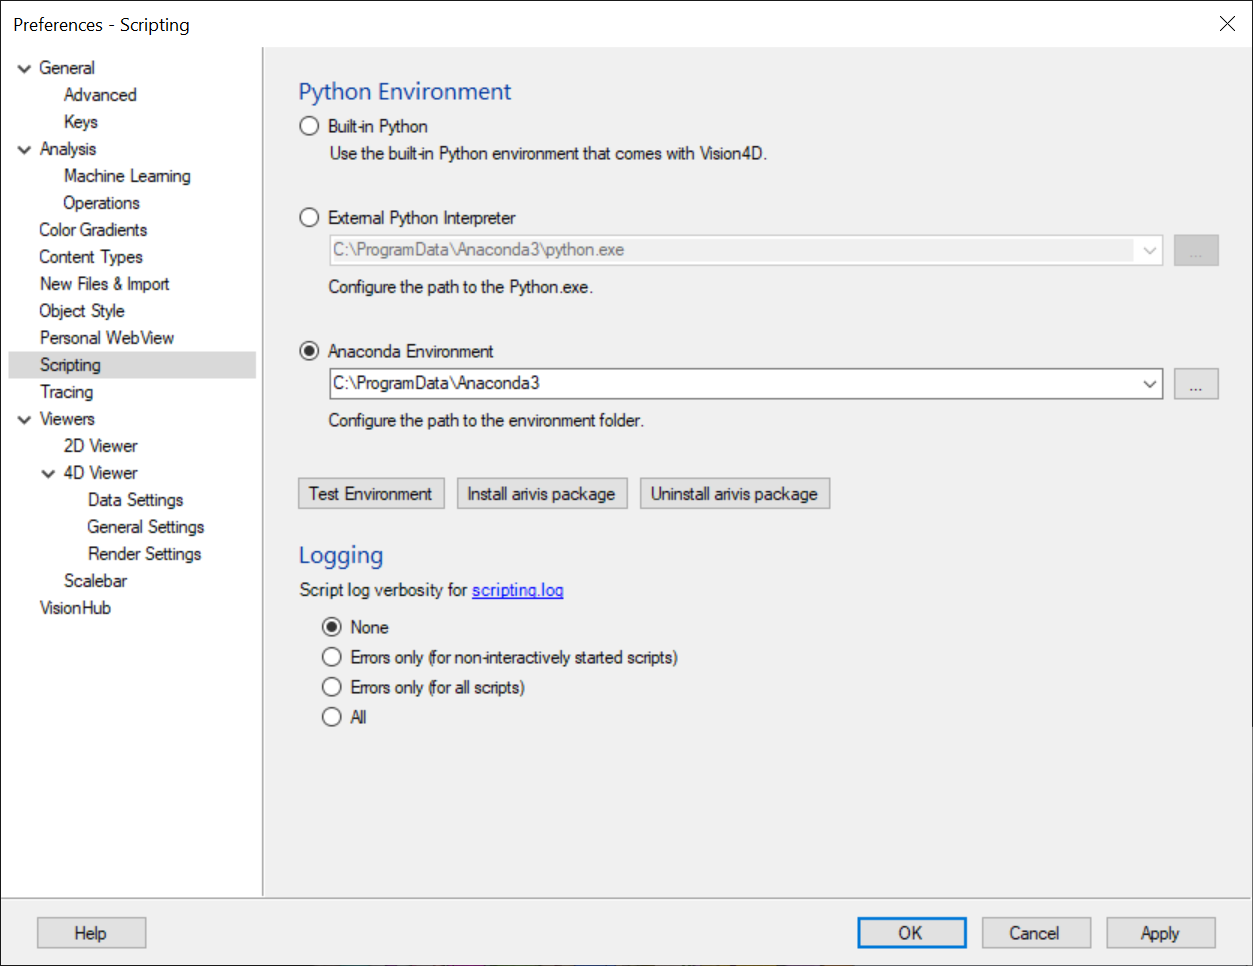
Then, we need to install the arivis package in the Anaconda environment by clicking on Install arivis package. And finally, we can test the installation o the arivis package by clicking Test Environment.
Note that some scripts require specific custom environments (e.g. StarDist, CellPose). In such cases, the Anaconda environment should be set to those locations and the arivis package also needs to be installed in that location. Note that if we have set up additional environments Vision4D stores a list of previously used environment locations and these can be accessed by clicking on the drop-down arrow at the right of the environment path field.