This article examines the factors that affect the rendering time for exporting high-resolution snapshots and movies.
TLDR
The time it takes to render a single snapshot is mostly dependent on the Data and Image Resolution setting. Higher data resolution means more data to process and more time. Reduce the Data and Image Resolution parameters to speed up the rendering time.
When rendering animations the framerate is also important. The higher the framerate the more images we have to render, and the longer it will take.
Introduction
Vision4D has been designed to enable scientists to work on images of virtually unlimited size. As long as you have enough hard disk space to hold the data, all functions of Vision4D are available regardless of the size of the dataset. However, processing more data will take more time.
Regarding the 4D viewer performance, the main limiting factor is the graphics card's capabilities. Specifically, the GPU is limited by the amount of video memory available (VRAM), and the speed/number of graphics processing cores.
When the 4D viewer is activated for the first time on a new installation, the software will run a system check to optimize the performance based on the given hardware. This means that depending on the speed of the GPU we will calculate how large a volume we can render at an acceptable level of performance. For a low-end GPU, like onboard graphics systems, this may mean a maximum of around 256 x 256 x 256 pixels. For high-end GPUs, we may be able to render up to 2000 x 2000 x 2000 pixels.
If the dataset is larger than what the GPU can handle smoothly, Vision4D will automatically subsample the image to a more practicable volume. This is why we see a "loading data" progress bar at the bottom of the viewer:
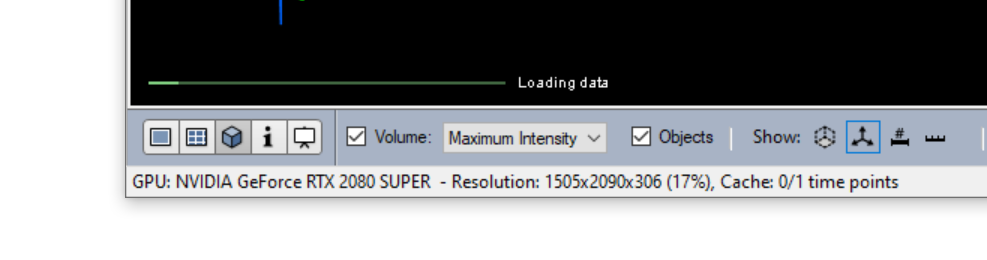
The other indication that we are subsampling is the Resolution values in the status bar. In our example above, the subsampled resolution is 1505x2090x306, which represents 17% of the actual image data.
While working with the 4D viewer, interactivity is clearly a very important factor. This means that we need to be able to render the volume speedily to enable a high frame rate to reduce lag. To enable speedy renders, Vision4D will usually temporarily drop the image data resolution while the volume is moving/rotating, and then enable a higher resolution once the volume is immobile.
 |
 |
| Moving | Static |
The drop in resolution is considered an acceptable trade-off for the speed increase that enables interactivity.
All this means that under normal circumstances, users can always smoothly visualize and navigate through even very large datasets on any computer they might be using the software on.
How is producing a high-resolution snapshot different?
When in the 4D viewer, we can always use the Snapshot button ![]() to quickly take a snapshot of the viewer that we can then paste into another application.
to quickly take a snapshot of the viewer that we can then paste into another application.
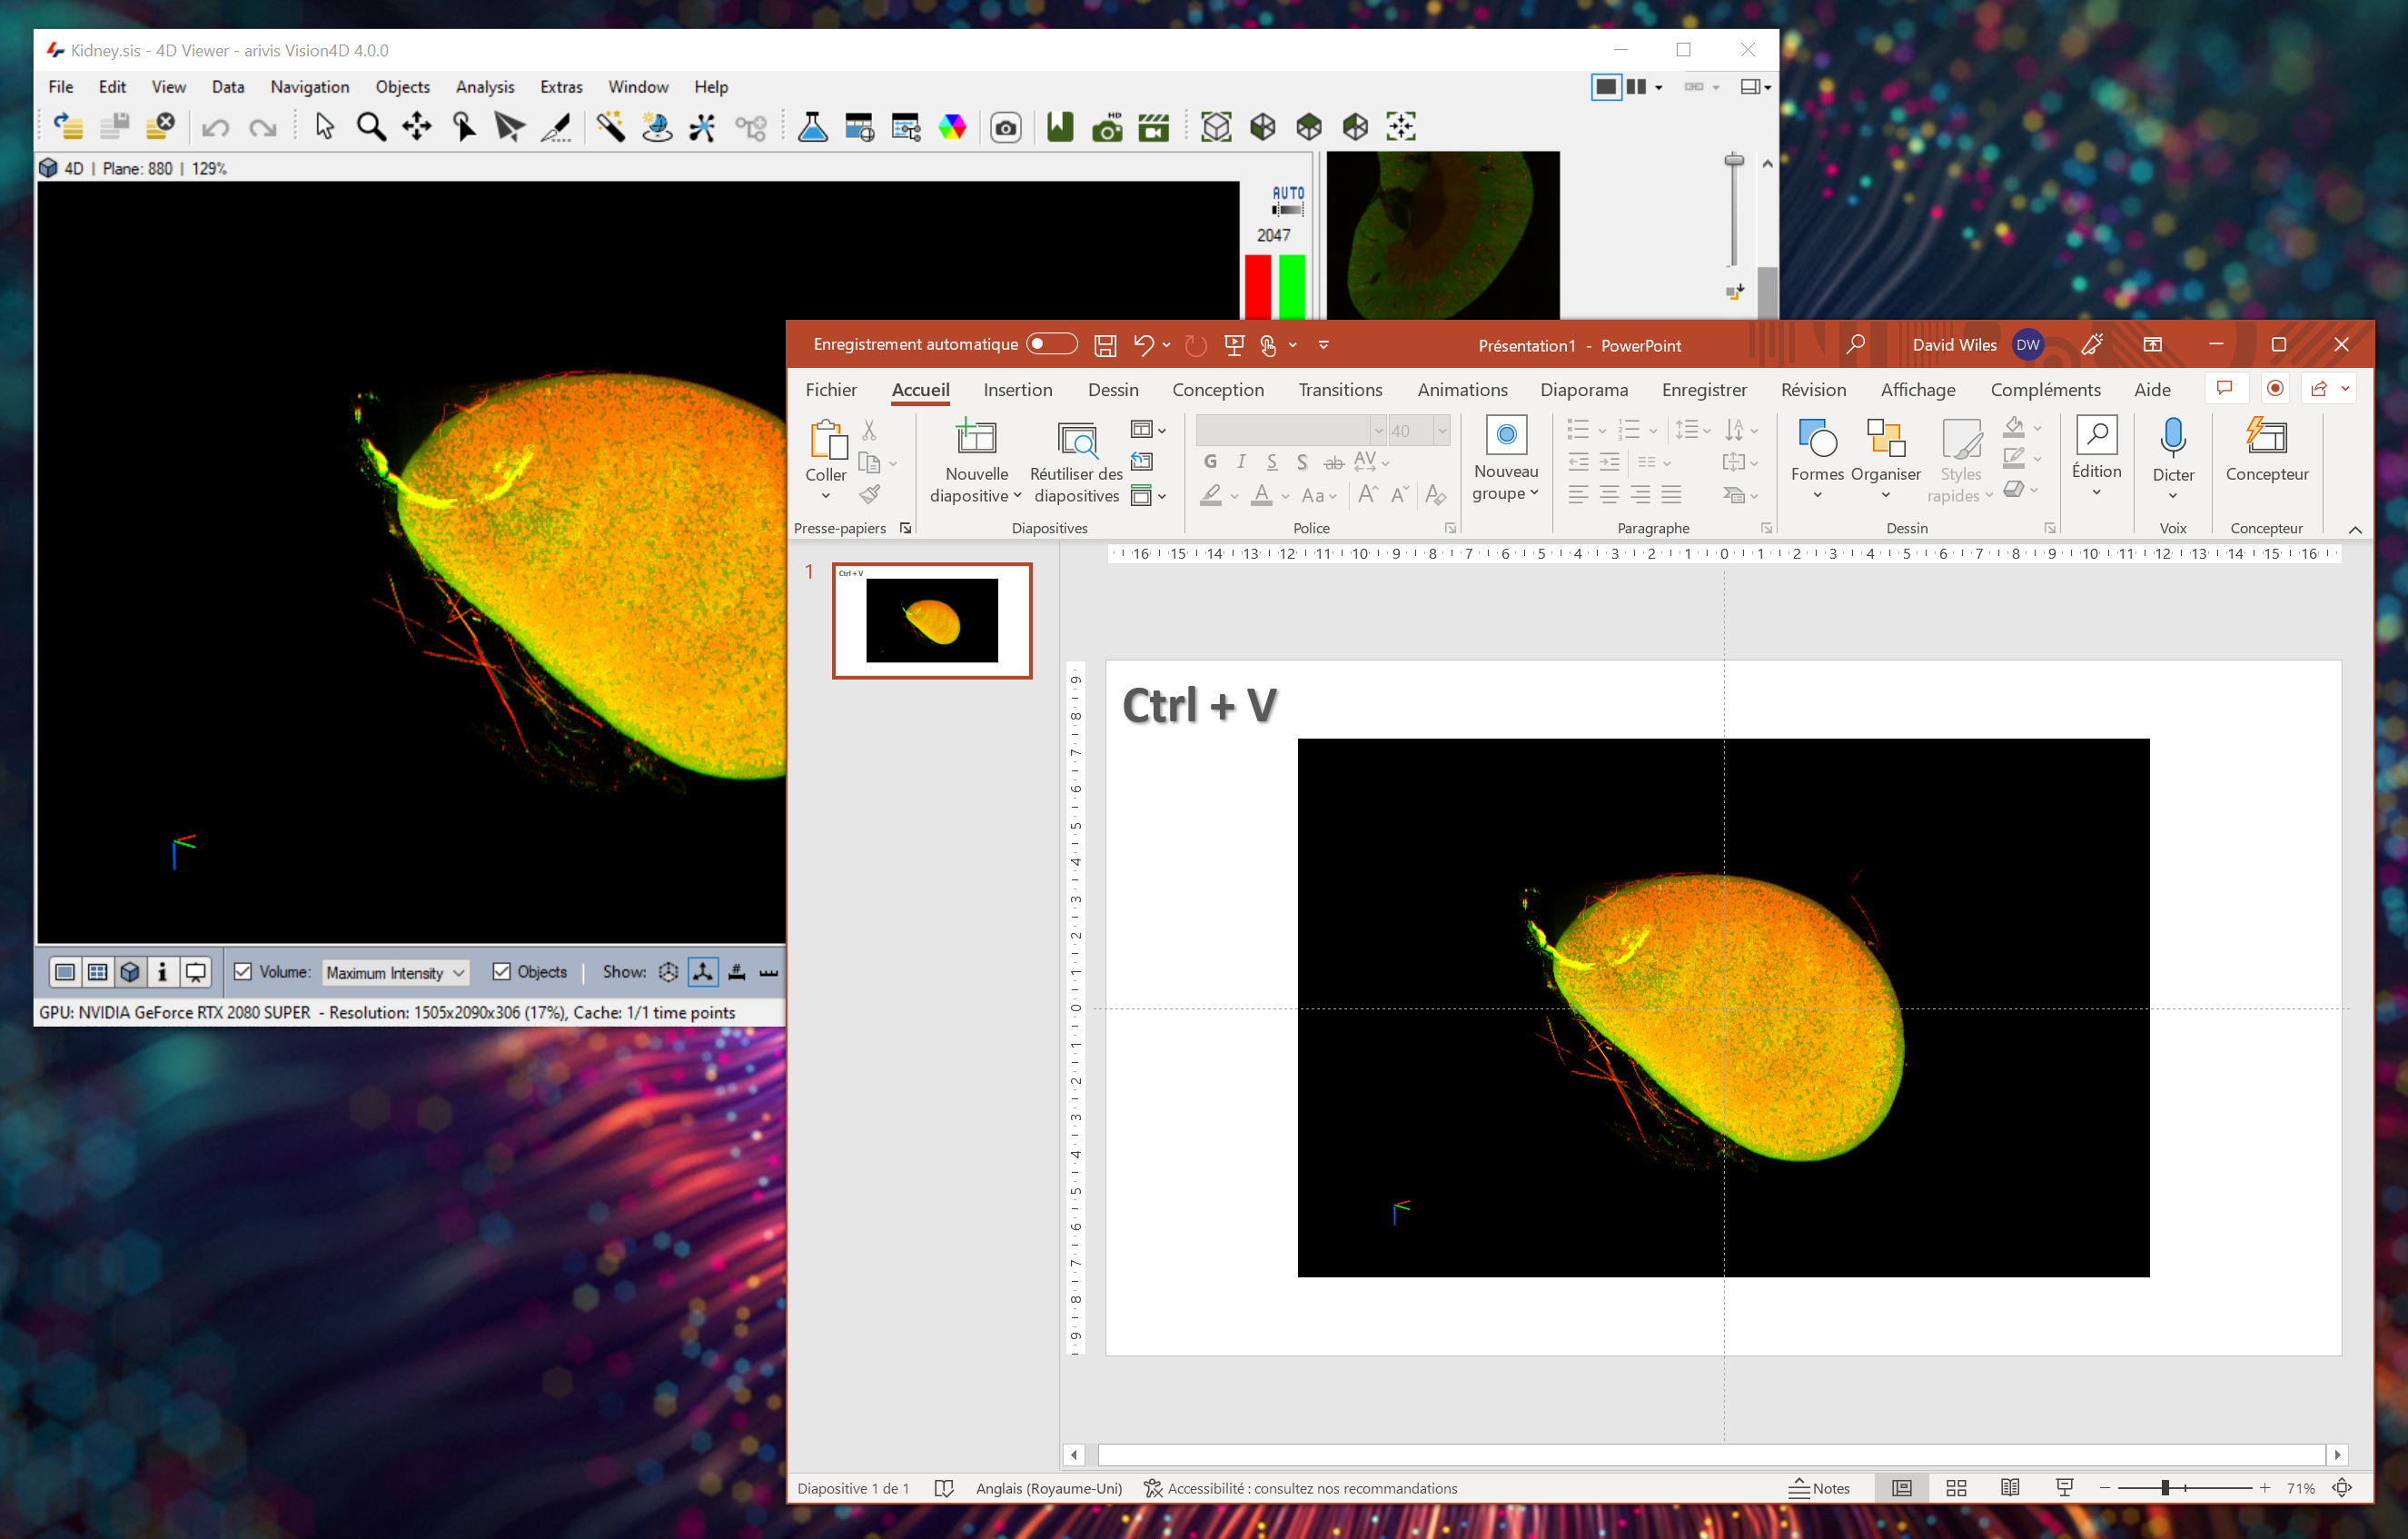
This process is instantaneous, but the resolution of the image is as it was in the viewer. It is essentially a screengrab.
In many cases, snapshots at that resolution are perfectly fine, but for an important presentation, or if the image will be displayed in a larger format (e.g. poster), getting a better quality image may be desirable. In those cases, we can use the high-resolution snapshot button instead.
When using the high-resolution snapshot![]() , we can select from additional options to change the size and quality of the image output.
, we can select from additional options to change the size and quality of the image output.
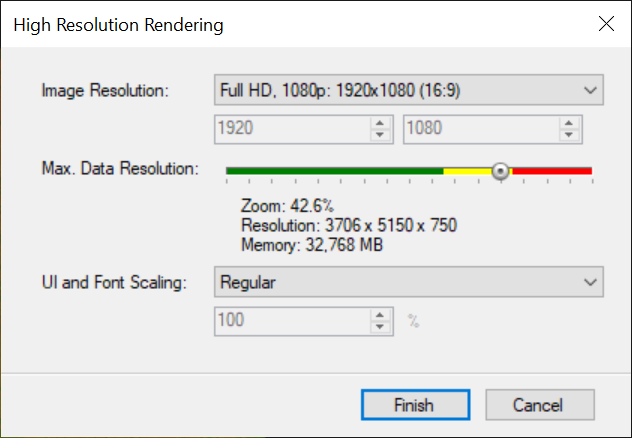
The two options that affect the quality and processing time are Image Resolution and Data Resolution.
The image resolution dictates how big the output image is in pixels. For a slideshow or text document illustration, a Full HD render is usually sufficient. For a large poster or visualization on a high-resolution screen, a higher resolution may be preferable. Going from 1080p HD to 4K UHD can lead to a 3-4x increase in rendering time.
The Data Resolution changes how much of the image data is used to render the image. A higher data resolution will result in a smoother image and finer detail. The scale of the Data Resolution bar goes from 64MB on the left, to whatever is the full data resolution on the right. Typically, each graduation means a doubling of the amount of image data that is used to render the image. Using more data to render the image results in finer details as mentioned above, but also results in longer loading times because we're loading more data, and longer rendering times because we're processing more data.
Note that the Data Resolution scale is color-coded according to the size of the dataset and the computing resources available.
The green part of the scale represents the amount of video memory available. As long as we stay within the green range, the data selected will be loaded into the GPU's VRAM and the processing time will generally be fast.
Most computers have more system memory (RAM) than they have video memory (VRAM), and so, if the dataset is larger than the amount of VRAM available we may be able to load it into the RAM instead. The loading time is likely to be longer because we are loading more data, but the rendering time will be longer still because now the GPU is also having to access and process the data from the RAM instead, which is slower than reading from the VRAM. So, while doubling the data resolution while staying in VRAM can result in a 3x rendering time increase, doing so while switching to RAM causes a 5x increase in rendering time.
Large datasets (those larger than the RAM available on the system) can't be loaded all at once in either the RAM or VRAM. In these cases Vision4D still allows users to generate high-resolution snapshots and videos, but the software will proceed by loading smaller chunks of the data, one at a time, processing each in turn before loading the next block and so on until the full dataset has been processed. Clearly, this method is much slower, not only because of the larger amounts of data we must process but also because the process of subdividing the image is comparatively inefficient. Consequently, processing datasets at a resolution larger than what is possible to store in RAM will be much slower.
Note that using a very high level of Data Resolution coupled with a low Image Resolution is likely to lead to much longer processing times without significant improvements in image quality, at least from a low-level zoom. A high level of Data Resolution is most useful if the snapshot uses a highly zoomed-in region of the volume.
So what about movies?
We can use the storyboard to create 3D animations and in that case, we have to render multiple images, which will clearly take longer than a single snapshot. So what affects the rendering time for a movie?
First, everything mentioned above concerning high-resolution snapshots is also valid for animations. So again, the data resolution and image resolution both affect the time it takes to render individual frames.
Additionally, when exporting animation we have a few additional options:
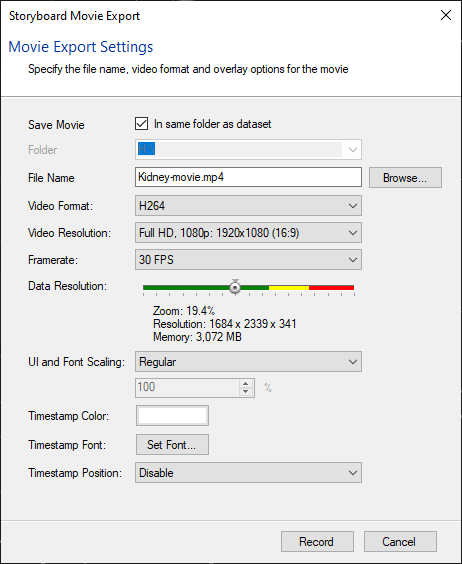
The first two, file name and video format, have no significant effect on production time. They are just necessary because, unlike snapshots that will be relatively small and can be held in memory before we save them, movies create much larger file sizes.
We mentioned the video resolution and data resolution above, and clearly, this will have an effect. Note also that if your animation also includes progressions through time then the system will have to load each time point it renders which will also increase the total processing time.
But now we have one more setting, which is the framerate. This defines how many individual images the render will produce. If your animation is 10s long, and your production framerate is 30FPS, the software will need to render 10x30=300 images. So, if the software takes 2 seconds, not including the loading time, to render 1 frame, it will need 600 seconds (10min) to render the full movie. If instead, we render at 10FPS we only need to render 100 images and the production time will be about 3 minutes. Note that reducing the frame rate also leads to significantly smaller file sizes.
In most cases, a framerate of 25FPS is ample for smooth animations. For smaller videos that fit more easily in a slide deck reducing the framerate to 10FPS may be acceptable. The video will not be as smooth, but this may be enough for the purposes.
When rendering videos for visualization in a 360 video that people might look at through a headset a higher framerate may be preferable to reduce the flicker effect, but you will also need to use a very performant video player to ensure it is capable of playing back the larger amounts of data at the increased frame rate.
Conclusions
The time it takes to render images is dependent on several factors, including data resolution, the size of the image or video we are producing, and the framerate. As with many things, higher quality and bigger datasets lead to longer processing times.
At arivis, we decided that everything a user might want to do should be possible regardless of the size of the dataset, so the option to render videos at the highest possible quality is always possible, but that does not mean to say that this process won't take a lot of time and that some compromises aren't necessary if time is an important factor.