This article explains in some detail how arivis handles large data in the context of the 4D viewer.
Introduction
Generally, whatever is displayed on your computer screen has to be held in the computer's memory. This is true for 2D images and 3D images. The memory requirement is mostly defined by the number of pixels we must display. This means that a JPEG image and a TIFF image of the same dimensions will need the same amount of memory, regardless of the amount of space they take up on the hard drive. So, a 1-megapixel image (1 million pixels) typically requires 1 megabyte of memory. For color images, where we have 3 channels for each pixel that image would require 3MB of RAM. Some modern computer systems can display 10 bits of intensity resolution which requires a little more memory to display but this is not particularly relevant in this topic.
Most computer displays only have between 1 and 8 million pixels with which to display images, along with the rest of the user interface. So if we are dealing with very large images in 2D (images that are much larger than the display canvas) it is not usually worth loading the entire image in memory to then only display a fraction of the pixels. Because of this, many imaging software packages make use of Just-in-Time (JiT) loading to only put in memory those pixels that we can display, and if we zoom in on the image we will purge the memory of those pixels we are no longer displaying and load the pixels we were unable to show before.
arivis software solutions have all been built around these JiT strategies, and use an efficient file format to enable us to do this, which is why arivis only "opens" SIS files and any other file (CZI/TIFF, etc) must first be imported.
However, when dealing with 3D stacks, JiT loading becomes a lot more difficult since we now need to display multiple planes simultaneously, from different perspectives, while remaining interactive to keep the viewer useful. Because of this, we need a slightly different strategy.
Rendering 3D stacks as volumes
When we do volumetric rendering a few different things happen that we need to bear in mind.
First, 3D rendering is best handled by graphics cards which have their own dedicated memory, which is usually much less than the system memory. While most PCs have between 8-32GB of system memory, most GPUs only have between 4-12GB of VideoRAM. Of course, high-end computer systems can have a lot more than 32GB of RAM, but even very high-end GPUs rarely go above 32GB of VRAM.
32GB of VRAM is clearly a very large amount of video memory, and plenty to hold most but the largest of imaging datasets, but beyond a certain point the amount of memory available becomes less important than the speed at which the GPU can process and render that amount of data.
One really important requirement for a volumetric viewer is interactivity. Without it, it is very difficult to get any sense of depth and of the spatial relationships within a dataset. At a minimum, we need to be able to render images 10-20 times per second. The only way we can currently do this is by only loading into the GPU a manageable amount of information. What is considered a "manageable" amount of information will depend greatly on how fast the GPU is, and sometimes on the amount of VRAM available.
The first time that a user opens the 4D viewer after installing arivis you will see that the software does an automatic optimization of the 3D settings. This optimization is based on the amount of VRAM and the speed of the GPU. The amount of VRAM defines how much of a time series we can hold in cache to display it quickly when navigating through time (as far as the 4D viewer is concerned, each times point is essentially a whole separate stack). The speed of the GPU dictates the level of detail that we can display, or more precisely, the number of pixels we can display efficiently. For a low-end GPU, like what is included in so-called "on-board graphics", this might be as little as 16MPixels, for very high-end GPUs we might manage 8GPixels.
For reference, the Mega/Giga-pixel count for an image is the width x height x depth. So if your image is a 1000x1000x1000 cube, your image represents 1 billion pixels or 1GPixel.
So what happens if our image is larger than the maximum the GPU can handle smoothly? Simply, we downscale it to something more manageable. If the dataset is 3x larger than the GPU can handle we will load only a third of the total image. This happens automatically when you switch to the 4D viewer when the "loading data" progress bar shows at the bottom of the screen.
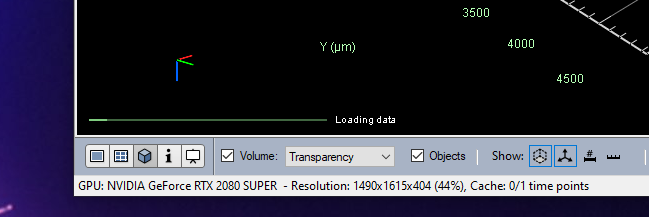
The other thing we can see right at the bottom of the window is the GPU that arivis detected and is using and the current resolution we have loaded for the current dataset. In our example above, we have downsampled the volume to 44% of the original image stack, which represents a volume of 1490x1615x404 pixels, or 0.9GPixels.
Note that for volume rendering we can only use one GPU since this is not a task that can be shared across multiple cards.
So what effect does this have on what we see on the screen?
First, it means that you will see that you can dynamically navigate through the dataset, and change visualization settings without a significant lag.
But second, it also means that you may not see some fine details so small objects might not be clearly distinguishable. Also, the level of downscaling together with patterns in the image can sometimes result in Moire patterns or stripes. The vertical stripes we can see in this example below are an example of sub-sampling patterns appearing.
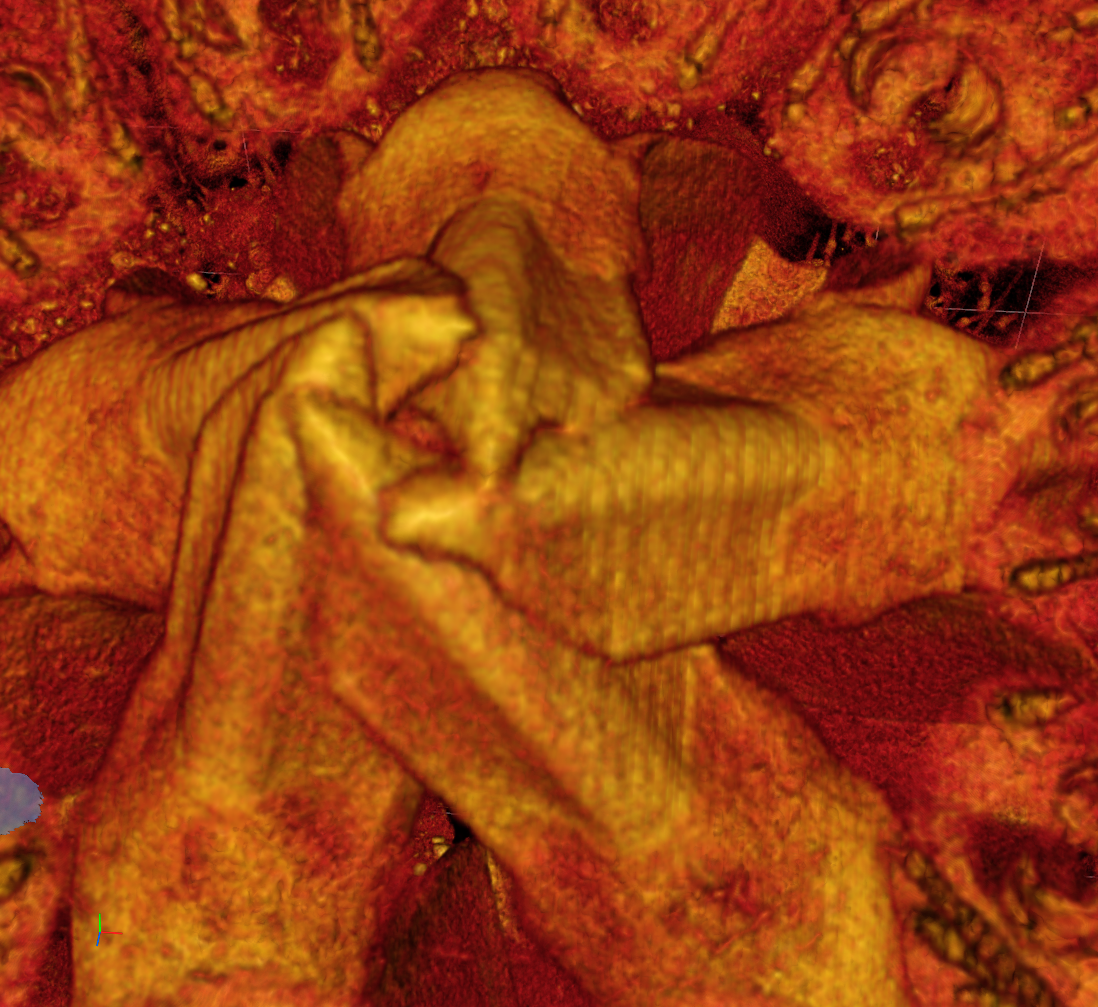
This kind of pattern is caused by the downsampling strategy we use as we try to strike a balance between the quality of the render and the time it takes to downsample the data.
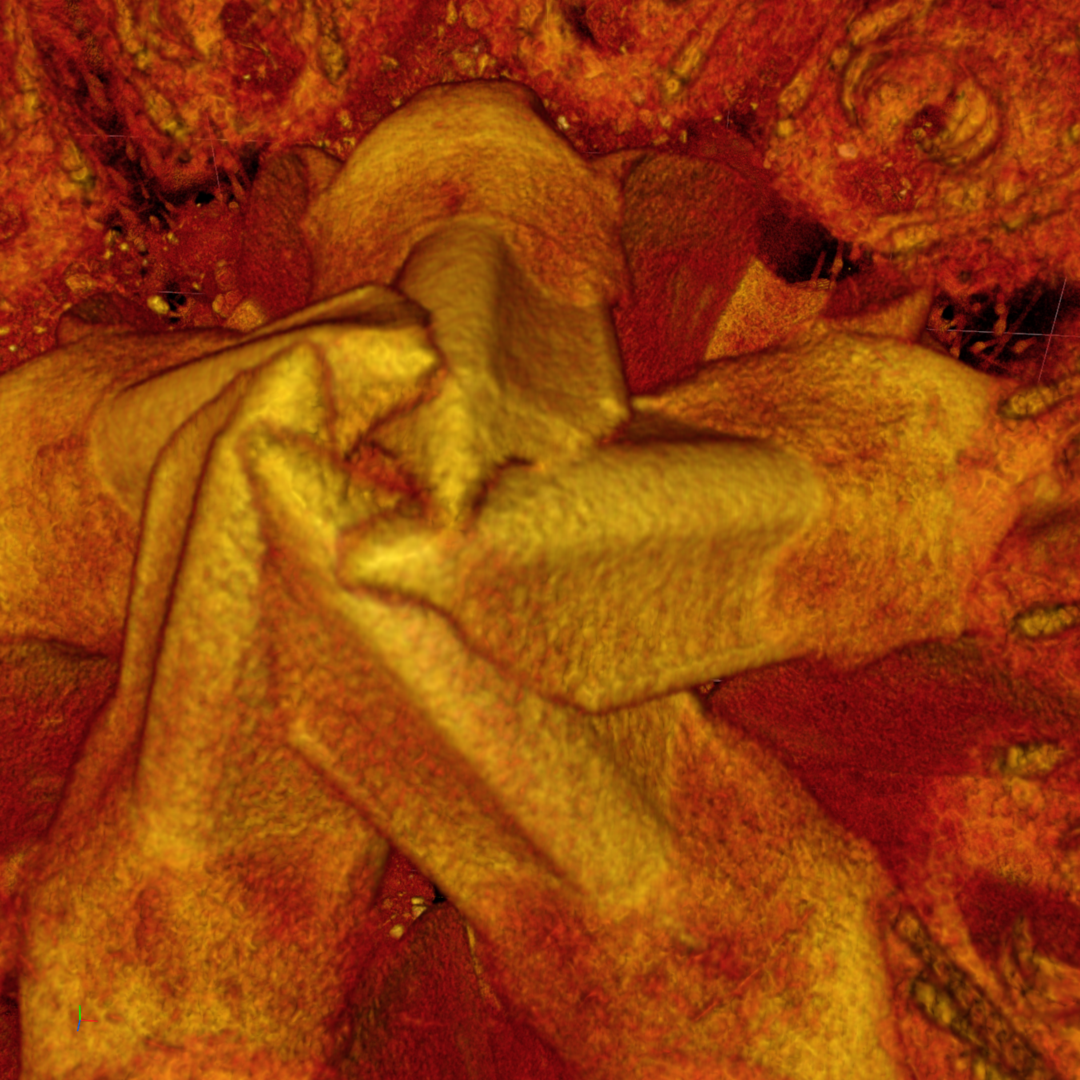
Note, however, that it is always possible to render full-resolution images if needed, though users should bear in mind that producing such renders requires a lot more computing resources and time:
How can we improve the rendering in the 4D viewer?
It depends on what one means by "improve". Generally, until computer graphics technology improves much beyond what is currently available, when it comes to large datasets we will always have to choose between quality and time. If we want a higher quality it will take more time to load, more time to render, and therefore a less interactive experience. If we want faster rendering we need to sacrifice quality. But first, it is important to remember that the purpose of the 4D viewer is to provide a way to manually interact with 3D data, which requires a certain level of interactivity and therefore a reasonable rendering frame rate. If our intention is to produce a high-quality screenshot or animation then we should use the HD Screenshot or Storyboard tools.
So what are the options available?
Upgrading the GPU
It may be worth considering if there are faster GPUs available. If your PC is old, or your GPU is on the lower end of capabilities, then replacing the GPU could significantly reduce the amount of downscaling required. Laptop GPUs are generally significantly slower than their desktop equivalent and so using a desktop workstation may be preferable if the quality of the view in the 4D viewer is important to you. Of course, if you already have a workstation with the software installed this may not be a practical solution and in any case, it could be quite expensive. However, as mentioned above, once datasets get larger than a certain size, there are increasingly fewer GPUs that can handle such datasets at full resolution, and beyond a certain size, downscaling is simply inevitable.
Note also that a more expensive GPU may not necessarily be faster. Gaming GPUs are generally just as fast as their "professional" equivalents, but significantly cheaper, with the difference in price coming down mostly to the type and amount of VRAM available and the availability of certified drivers for certain specific applications. As an example, you can get comparable rendering speed from an NVIDIA RTX 4090 as from an NVIDIA RTX 6000, but the RTX 6000 is 4x the price. See our article on recommended hardware configurations for more information.
Clipping the dataset to a manageable volume
The simplest way to get a higher resolution render in the interactive 4D viewer, without sacrificing rendering speed, is to use ROI clipping to reduce the amount of data that is loaded, and thereby fit more within the capabilities of the GPU.
Of course, the sacrifice there is the field of view, Using clipping means it is no longer possible to see the entire volume which could leave out some important context and makes it more difficult to navigate to regions outside of the current region.
Changing application preferences
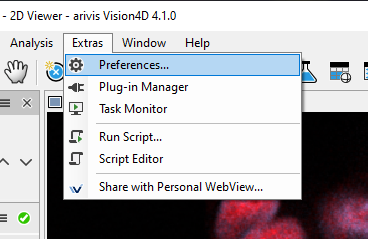
Beyond hardware changes and region clipping, there are a few options available in the preferences that users can set to optimize the performance according to their requirements. We access the Preferences through the Extras menu.
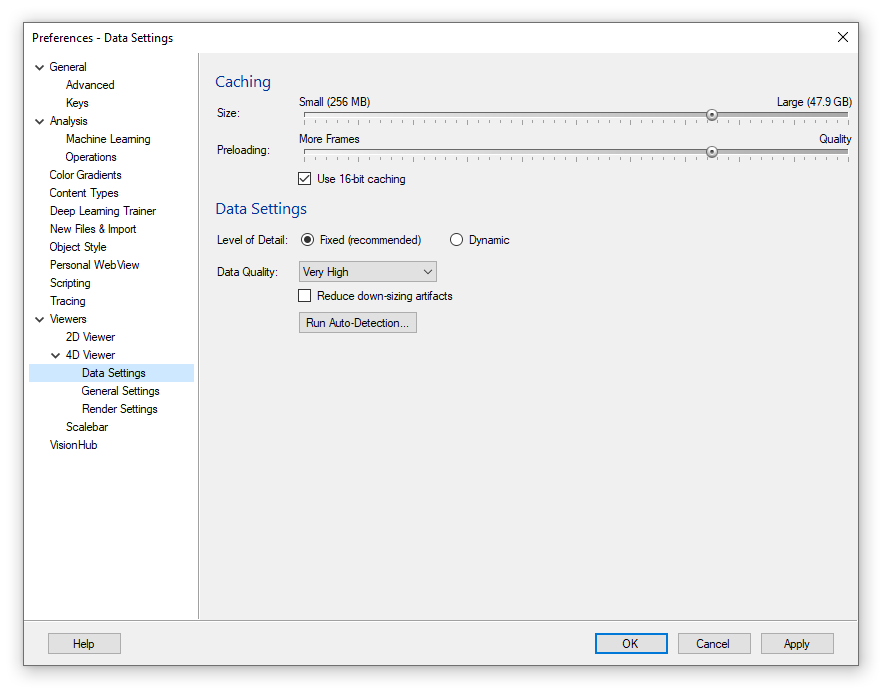
First, it may be worth using the "Run Auto-Detection" button to get a good starting point based on our recommendation.
This will set the caching based on the available amount of VRAM which is important if you are frequently visualizing time series in the 4D viewer. It will also set the Data Quality parameter, which is the amount of VRAM that will be used to display a single volume. The data quality scales from "Low" to "Ultra", but it is also possible to manually choose how much we want to use using the "Custom" option.
Note that the maximum will be dictated by the amount of VRAM available on the GPU.
A higher level of quality will generally result in finer details and fewer downscaling artifacts but will result in longer loading times and slower frame rates. Try increasing the quality by one rank and see if the performance remains acceptable for your personal use.
Note that displaying large numbers of segmented objects will add significantly to the GPU load, which combined with higher data quality can lead to very significant slow-downs.
Using the "Reduce down-scaling artifacts" option can improve image quality but takes longer to load.
Additional options are available that also have an effect on rendering speeds under the Render Settings tab. The details of these options can be found in the help files.
Conclusions
There has always been a race between the largest datasets we can collect and the computing capabilities available to process those datasets. The limit for what is considered a "large" dataset today, will be different from what is considered a "large" dataset in the future, but while computer graphics might one day evolve to handle what we currently consider large readily, by then it is likely that much larger datasets will exist and the problem will still remain. Various strategies exist to handle this disparity, but in the end, we need to pick one. Arivis currently uses the strategy described above because it is what we currently consider to provide the best compromise. These and other considerations are also discussed in this article about HD screenshots and storyboard processing times.
Please do let us know if you found this page useful, and feel free to contact your local support team for more information.