How to: Align multiple 3D images based on the nuclei staining
The goal of this application note goal is to guide the user in the correct installation of the Anaconda3 Python package and the image registration workflow. This script will read multiple .czi image files (or SIS imagesets) in a given folder in a tile-wise manner and create the SIS files for each of the original files. During the registration process, the new SIS file will be created with each tile as a new imageset. The first cycle image will be copied from the original file and the image stacks from the following cycles will be registered to the first cycle image based on the indicated channel, typically, nuclei staining. In the last step, the Tile Sorter tool needs to be run to assemble the registered mosaic stack together. The resulting image can be used for the following image analysis.
TL;DR
To use image registration script in arivis Pro we need the following:
- Install anaconda python
- import the registration environment in the Anaconda Navigator
- Configure arivis Pro to install the arivis libraries into the registration environment
- Define the required parameters and run the image registration script
- Assemble the resulting image using the Tile Sorter tool in arivis Pro for the following analysis
Introduction
Image registration is the process of transforming different sets of data to overlay images from different experiments, taken at different times, positions or angles, or with different imaging modalities. The algorithm attempts to discover the matching areas and align them together. Image registration methods can be divided into two large groups: rigid and non-rigid transformations. For the multiplexing experiments, we will use the nuclei staining in each of the experiment cycles to register the subsequent experiments to the first image. This method is applicable both to 2D and 3D images.
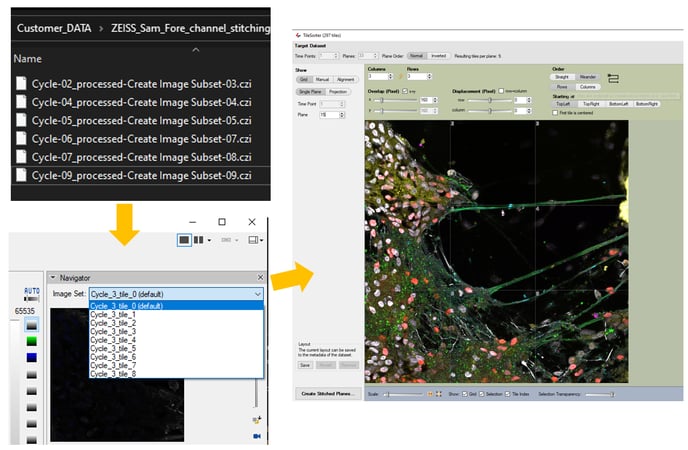
The application workflow starts from importing the original image files (for example, CZI) in arivis Pro and registering the subsequent experimental cycles to the first one based on the indicated nuclei staining channel (i.e. DAPI or Hoechst). The images will be imported as a stack of individual tiles with all the channels from all the experiment cycles, each registered to the nuclei staining in the first experiment cycle. After the registration, the mosaic image should be stitched using the Tile Sorter tool.
The images used in this application note were published in https://www.sciencedirect.com/science/article/pii/S0165027022001807
Image registration in a nutshell
Image registration is the process of transforming different sets of data to overlay images from different experiments, taken at different times, positions or angles, or with different imaging modalities. The algorithm attempts to discover the matching areas and align them together. Image registration methods can be divided into two large groups: rigid and non-rigid transformations. For the multiplexing experiments, we will use the nuclei staining in each of the experiment cycles to register the subsequent experiments to the first image. This method is applicable both to 2D and 3D images.
The application workflow starts from importing the original image files (for example, CZI) in arivis Pro and registering the subsequent experimental cycles to the first one based on the indicated nuclei staining channel (i.e. DAPI or Hoechst). The images will be imported as a stack of individual tiles with all the channels from all the experiment cycles, each registered to the nuclei staining in the first experiment cycle. After the registration, the mosaic image should be stitched using the Tile Sorter tool.
Application Workflow
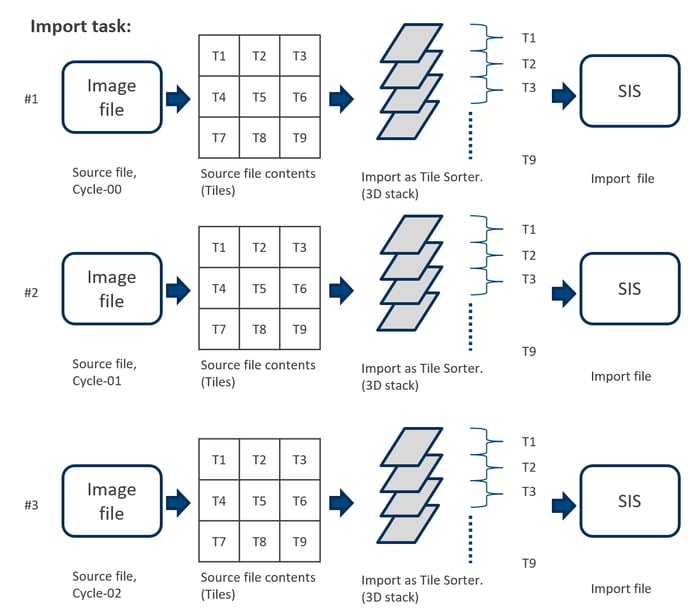
The application workflow starts by importing the original image files in arivis Pro. For each staining/hybridization cycle the new SIS file will be created. All Z planes from all the tiles will be imported separately into a single stack (single imageset). The import step is optional. Alternatively, the user can start the registration workflow by simply opening the already stored SIS files.
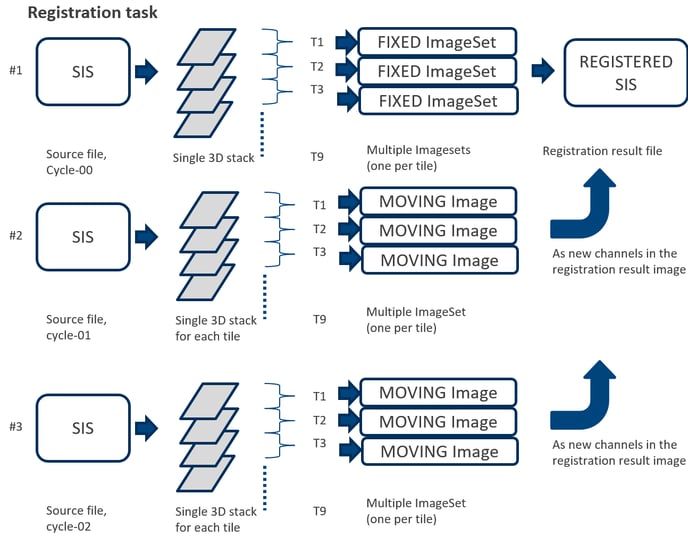
The registration workflow starts from creating the new SIS file to store the registration results. The first cycle image (fixed) will be identified automatically based on the filename. This image will remain untransformed. The 3D stack for each subsequent cycle (moving) will be transferred as new channels in the corresponding tile in the registered image file. The number of tiles should be consistent for all staining cycles.
Preliminary Remarks
arivis Pro runs multiple applications (image registration) using external and independent Python libraries and tools produced by third parties. These tools must be installed by the user under its responsibility, strictly following the instruction on this document. arivis has tested the setup protocol on several computers, however, due to the different and not predictable hardware and software configuration of each computer, the results can be different case by case. Therefore, arivis declines any responsibility concerning the correct tools installation and setup on the user computer. arivis cannot be blamed about any malfunctioning or failure of the deep learning environment setup. arivis will not give technical support on the setup task. Both activities are totally on the user charge. arivis also declines any responsibility about the scientific results gathered from this application.
Installing the prerequisites
To use the registration script for multiplexed data in arivis Pro, we need 3 configuration steps:
- Install Anaconda Python
- Import the registration environment
- Configure the arivis Pro Scripting preferences to use the environment.
Installing Anaconda
Instructions for downloading, installing, and configuring anaconda for arivis Pro can be found here.
Setting up the image registration environment
Once anaconda is installed we need to set up the registration environment. This environment can be downloaded here. To install it we need to start by opening the Anaconda Navigator with administrator privileges:
In the Anaconda Navigator, we can select the Environments tab and use the Import button to navigate to the YML file we downloaded earlier.
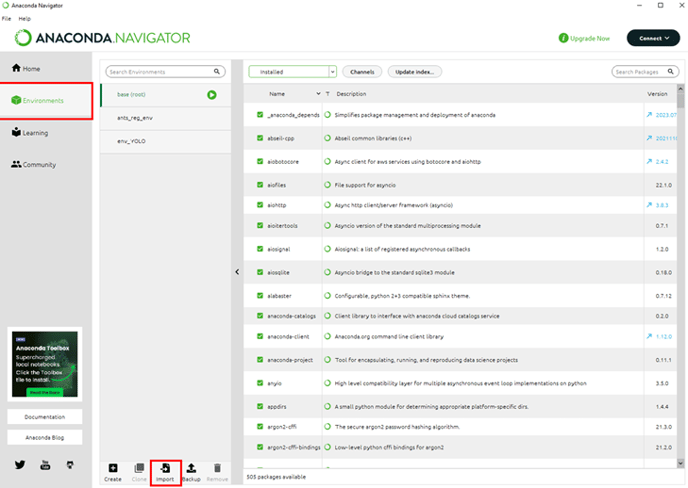
We can rename the environment to make it easier to keep track if using multiple environments and click Import to import it.
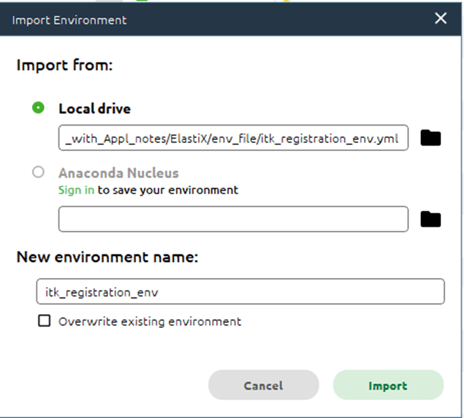
The import process can take several minutes.
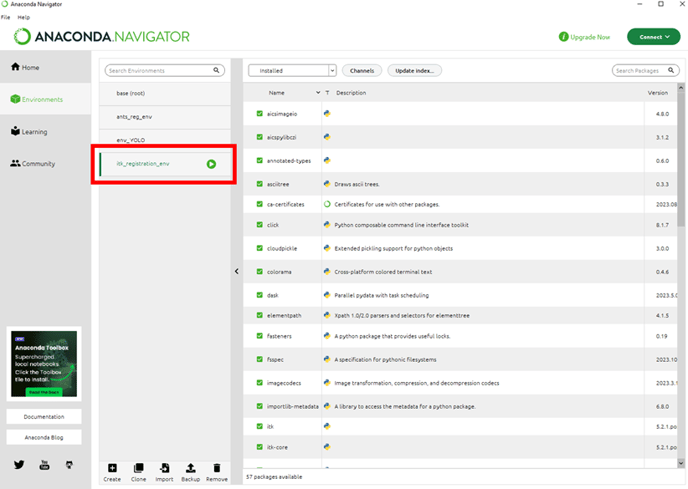
Once the environment has been created, we need to add the arivis package to this environment. This is done in the Scripting preferences. But first, we need to make a note of where the environment we just imported was created. The easiest way is to hover the mouse cursor over the environment name:
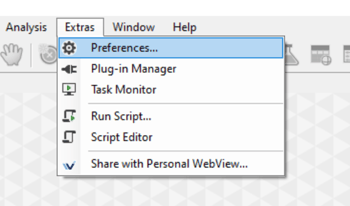
Then, in arivis Pro we can open the Preferences window (Extra> Preferences), and select the Scripting tab.
Then we can Install the arivis package in the right location, and it is best to test the installation happened as expected.
Running image registration for multiplexing data in arivis Pro
Having set up all the pre-requisites, we can proceed to image import and registration. The script which we can download here.
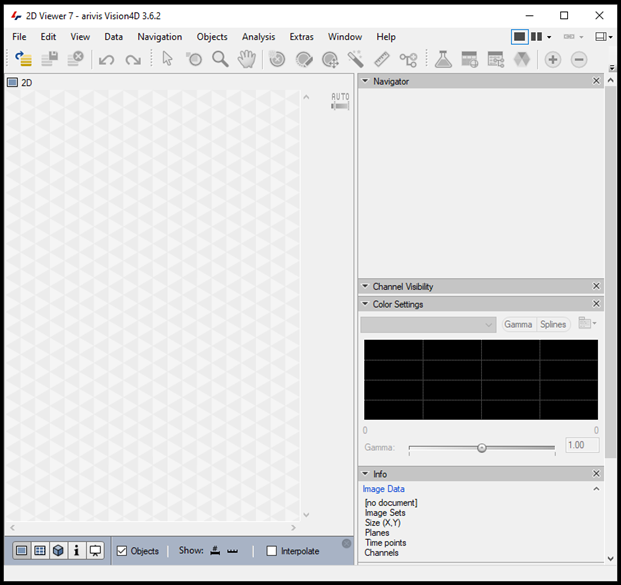
In order to run the image registration script, arivis Pro window must be opened.
- This could be a new window with no imageset open. In this case the new SIS file will be created in the same folder with the czi files are stored.
- If the SIS file is already open/created, the new imagesets will be imported into the existing SIS file. If the existing imageset names are identical, they will be overwritten.
To run the image registration script, the Script Editor must be open in arivis Pro:
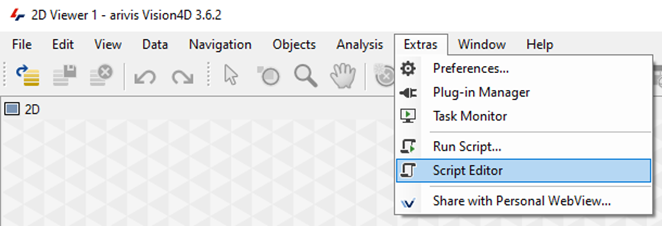
The Registration_for_omics_v7.py file can be opened in the arivis Pro Script Editor:
Several script variables must be customized by the customer, and are explained in the text below.
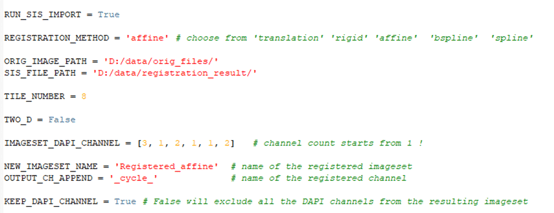
- Path to the original files must be provided:

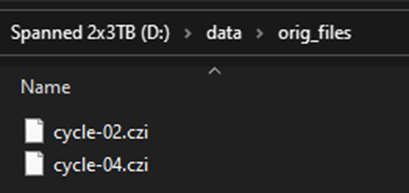
Important: Each image file must have ’-00’ (a dash symbol and a number) and the end of the filename. The file with the lowest number will be the fixed imageset and all the following images will be registered to this first imageset. The folder should have at least two images to run the registration on.
- We need to provide the path to the folder where the imported and the resulting SIS file will be stored:

Alternatively, the file import can be run earlier. The SIS files for each of the cycles must be opened in separate arivis Pro windows at the same time. If the imports were run earlier, we need to indicate this:
![]()
If the import is run from the script as the first part of the workflow, the empty arivis Pro window will be opened. The Import Dialog window will open. We need to run the import using the Tile sorter option, but do not start the stitching process:
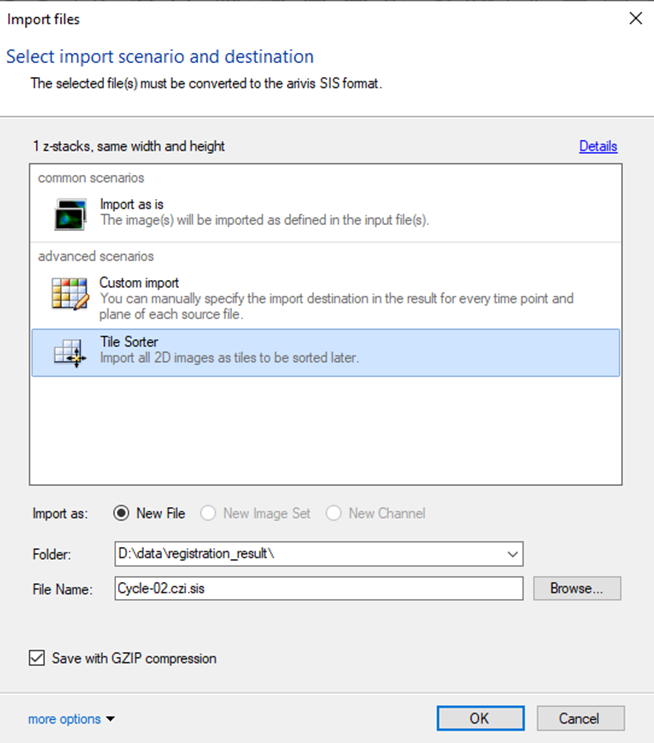
Important: if the SIS file conversion is run earlier, the import should be run the exact same way using the Tile Sorter import scenario.
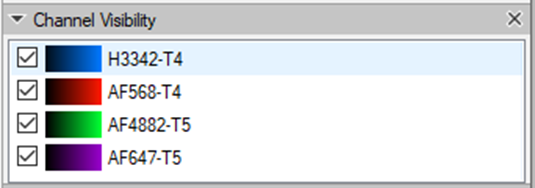
3. We need to provide the channel with the nuclei staining (i.e. DAPI, Hoechst) for each of the images/cycles in the experiment. The channel count starts from one. The number of the image files in the import folder or open SIS files must be identical or shorter than the number of channels in the IMAGESET_DAPI_CHANNEL list.
![]()
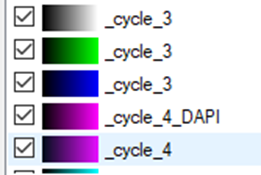
The number of the channel with the nuclei staining (for registration) can be checked in the working panel:
4. The tile number must be identical for every image stack in the experiment, as well as the Z spacing. The number of planes in each cycle image may differ. The registration result will have the same number of planes as the fixed ImageSet (cycle_01).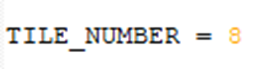
5. The workflow is applicable both on 2D and 3D image stacks. For the 3D images, the thickness of the single tile stack is computed based on the total number of planes in the stack divided by the number of tiles, provided by the customer. For the 2D images, please indicate: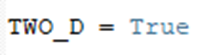
5. Next, we need to select the registration method:

as well as the name of the resulting SIS file and the registered channel names:

6. We may choose to exclude all the subsequent nuclei staining channels from the final imported file. If KEEP_DAPI_CHANNEL is set to False, we will only import the nuclei staining channel from the first image/cycle:

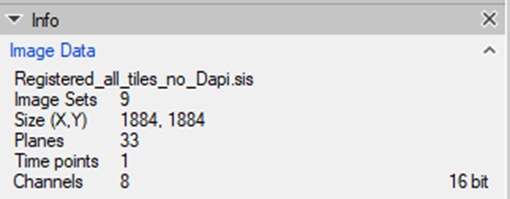
7. Once the registration process is finished, there will be an imageset created for each tile separately containing all the channels from all experimental cycles:
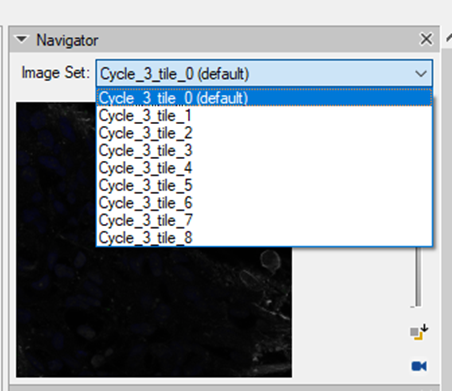
Each channel will be labeled according to the cycle in the experiment. The DAPI channels, if we decide to import them, will the renamed accordingly.
To set the same color settings for all imagesets prior to stitching them in the Tile Sorter, we need to set the preferences for one imageset and apply them on the rest of the images:
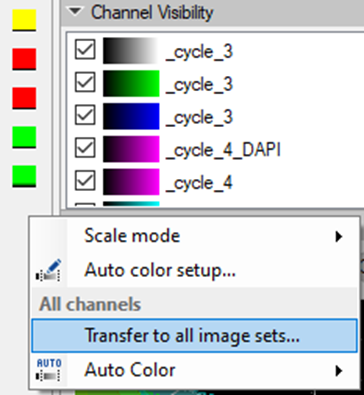
Image stacks will all the registered channels from the imaging cycles are imported separately and need stitching in the following step. The final image will be created from the individual imagesets all imported into one resulting SIS file.
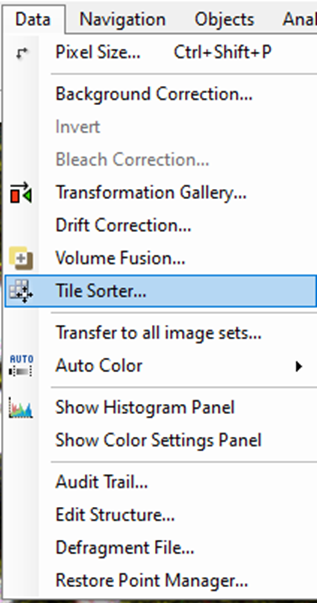
First, we need to call the Tile Sorter:
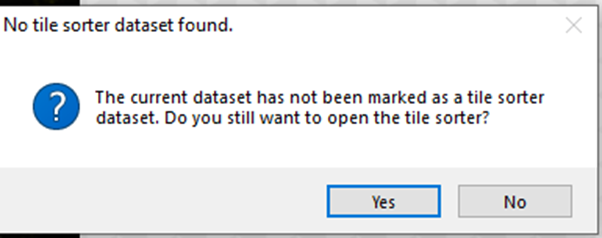
The following massage will appear. We need to confirm and press 'Yes'.
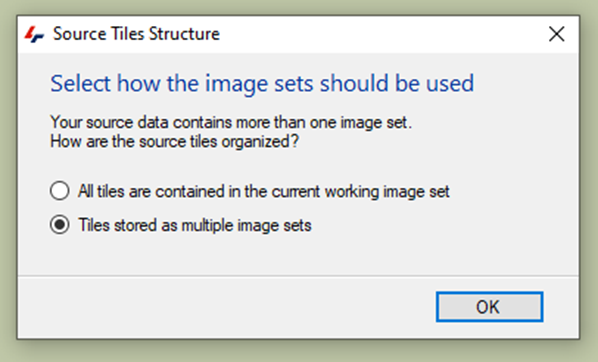
The following massage will appear:
In the Tile Sorter menu, we can adjust the number of rows and columns, or their order:
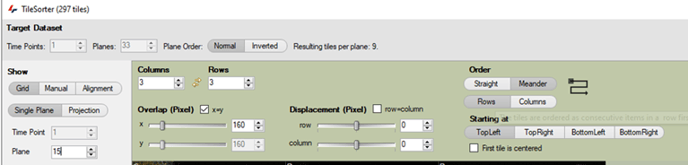
In the Tile Sorter menu, we can first arrange the tile positions as a grid:
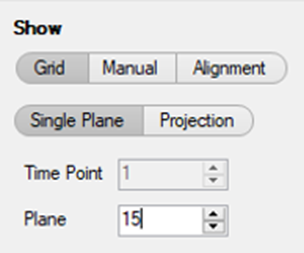
TIP: In addition, it is useful to go to the middle plane of the 3D stack or make a Maximal projection.
We can adjust the number of raws and columns, or their order, as well as the number of overlapping pixels:

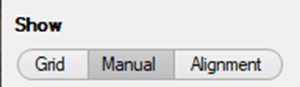
Next, the positions of the tiles can be adjusted manually:
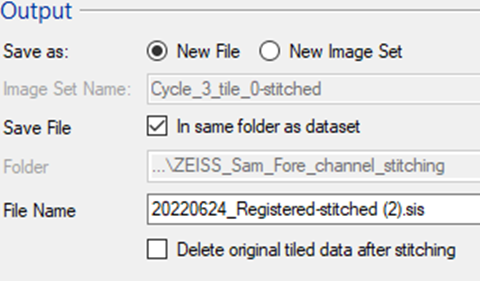
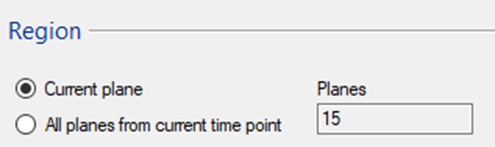
The resulting stitched image can be imported into the same imageset or as a separate (new) SIS file.
TIP: For the large file it is often worth first exporting and testing the alignment on a single plane and only stitching the entire 3D stack afterwards.
Download Full "How to : install and run predictions with Cellpose» PDF